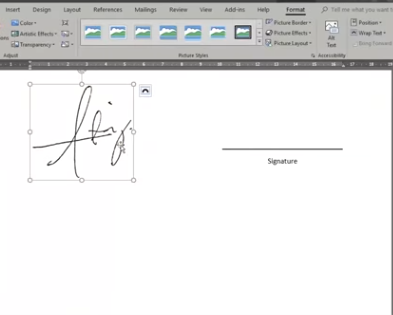
In today’s digital age, the necessity for secure and authentic methods of document verification has never been greater. Digital signatures, particularly in professional environments, offer a secure means of ensuring the integrity and authenticity of documents. Microsoft Word, one of the most widely used applications for document creation and editing, provides a built-in feature for generating digital signatures. This blog post will guide you through the process of creating a digital signature in Word, and discuss its importance and usage in a professional setting.
Understanding Digital Signatures
Before diving into the process of creating a digital signature, it’s essential to understand what a digital signature is. A digital signature is a mathematical scheme for verifying the authenticity and integrity of a message, software, or digital document. It is akin to a handwritten signature or a stamped seal, but it is far more secure. Digital signatures leverage cryptographic techniques to ensure that the signatory cannot deny signing the document and that any changes made after signing can be detected.
In a professional context, digital signatures are crucial for:
- Authenticity: Guaranteeing that the signature is from the stated sender.
- Integrity: Ensuring that the document has not been altered since it was signed.
- Non-repudiation: Preventing the signer from denying their involvement.
Prerequisites for Creating a Digital Signature in Word
Before you can create a digital signature in Microsoft Word, you must ensure you have the following:
- Microsoft Word Installed: A recent version of Microsoft Word (2010 or later) is recommended for optimal features.
- Digital Certificate: To create a digital signature, you need a digital certificate. This can be obtained from a Certificate Authority (CA) or you can create a self-signed certificate using tools such as the Microsoft Office Digital Certificate for VBA Projects.
Step-by-Step Guide to Creating a Digital Signature in Microsoft Word
Step 1: Obtain a Digital Certificate
- From a Certificate Authority: You can purchase a digital certificate from trusted Certificate Authorities like DigiCert, GlobalSign, or Comodo. Each CA will provide you with specific instructions for obtaining and installing the certificate.
- Self-Signed Certificate: If you only need a digital signature for internal use, you can create a self-signed certificate. To do this:
- Open Microsoft Office programs.
- Go to the “File” menu and select “Options”.
- In the “Trust Center” section, click on “Trust Center Settings”.
- Select “Digital Certificates” and then choose “Create Digital Certificate”.
- Follow the prompts to create and name your digital certificate.
Step 2: Open Your Document in Microsoft Word
Once you have your digital certificate ready, open the Word document you wish to sign. Ensure that the document is complete and ready for signing, as changes after signing can affect the integrity of the signature.
Step 3: Add a Digital Signature Line
To insert a space specifically for a digital signature, follow these steps:
- Navigate to the location in the document where you want the signature line.
- Click on the “Insert” tab on the ribbon.
- Locate the “Text” group and select “Signature Line”.
- In the “Signature Setup” window, fill in the necessary details such as signer’s name, title, and email address. You can also add instructions for the signer if required.
- Click “OK” to insert the signature line into your document.
Step 4: Sign the Document
After inserting the signature line, you can proceed to sign the document:
- Right-click on the signature line that you’ve just created.
- Select “Sign”.
- In the “Sign” dialog box, you can either type your name or upload an image of your handwritten signature.
- In the same dialog box, you may have the option to select your digital certificate. Choose the appropriate certificate from the dropdown menu.
- Optionally, you may add a signature block or additional information.
- Click on “Sign” to apply the digital signature.
Step 5: Save the Document
After signing the document, you’ll need to save it to ensure that the signature is retained:
- Go to “File” and select “Save As”.
- Choose a location on your computer and select the format. It’s advisable to save it as a Word Document (.docx) or PDF for wider compatibility.
- Click “Save”.
Step 6: Verify the Digital Signature
Once the document is saved, it’s a good practice to verify the digital signature:
- Open the signed document in Word.
- Click on the signature line at the bottom of the document.
- A pop-up will appear showing the signature details and whether it’s valid.
Best Practices for Using Digital Signatures in Word
- Use Trusted Certificates: Always use digital certificates from reputable Certificate Authorities, especially for official documents.
- Keep Software Updated: Ensure that your version of Microsoft Word and other software used for signing documents is up-to-date for improved security features.
- Educate Team Members: If you’re in an organizational setting, provide training to employees on the importance of digital signatures and the correct ways to use them.
- Maintain Confidentiality: Protect your digital certificate and password. Unauthorized access could lead to malicious use of your digital identity.
Conclusion
Creating a digital signature in Microsoft Word is a straightforward process that adds a significant layer of security and authenticity to your documents. With just a few steps, you can ensure that your professional communications maintain their integrity and are verifiably signed by you. As more institutions and individuals shift to electronic documentation, understanding how to use digital signatures effectively will enhance your professionalism and the trustworthiness of your documents in the digital realm.
By adhering to the guidelines and best practices outlined above, you can confidently navigate the world of digital signatures and take full advantage of what modern document management has to offer.
